
 Making a Spy Ball Jointed Doll!

WHAT DID I DO!
Hi! So as a crafting side quest, I decided to make a ball jointed doll of Spy, because why not! I’ve always adored BJD’s and have wanted to make a nendoroid or BJD of one of the Bewilthredverser’s for soooo freaking long. Doll customization has always been something I’ve been fascinated by…so I’m glad I got to do some of that!!! It was a lot of fun!
As to how this all came to happen, my friend hannah and I found these miku blindboxes (will be shown below) which were (shockingly) only like 20 bucks each...they come with a blank face so i was like haha if i see another and get a duplicate im gonna make Spy! You guys won’t believe this, but i found another one, got a duplicate, and so I infact decided to make Spy LMFAO. I sadly didn’t take photos of the process, so this will primarily a text-based recap. But that’s fine! Maybe you can still learn and perhaps get inspiration for your own things!

THE PROCESS!
So! Here’s a brief list of the materials I used for BJD Spy:
1. Acrylic Paint
2. Paint brushes
3. Craft Felt
4. Materials from the Miku BJD (like the clothes, shoes, various parts, etc)
5. Hot Glue + Hot Glue Gun
6. Nanodots (me and my friends most beloved)
7. Sharpie Paint Pen
8. A hair dryer
9. Scissors
10. Shapey air dry clay (which I eventually didn’t use in the end lol)
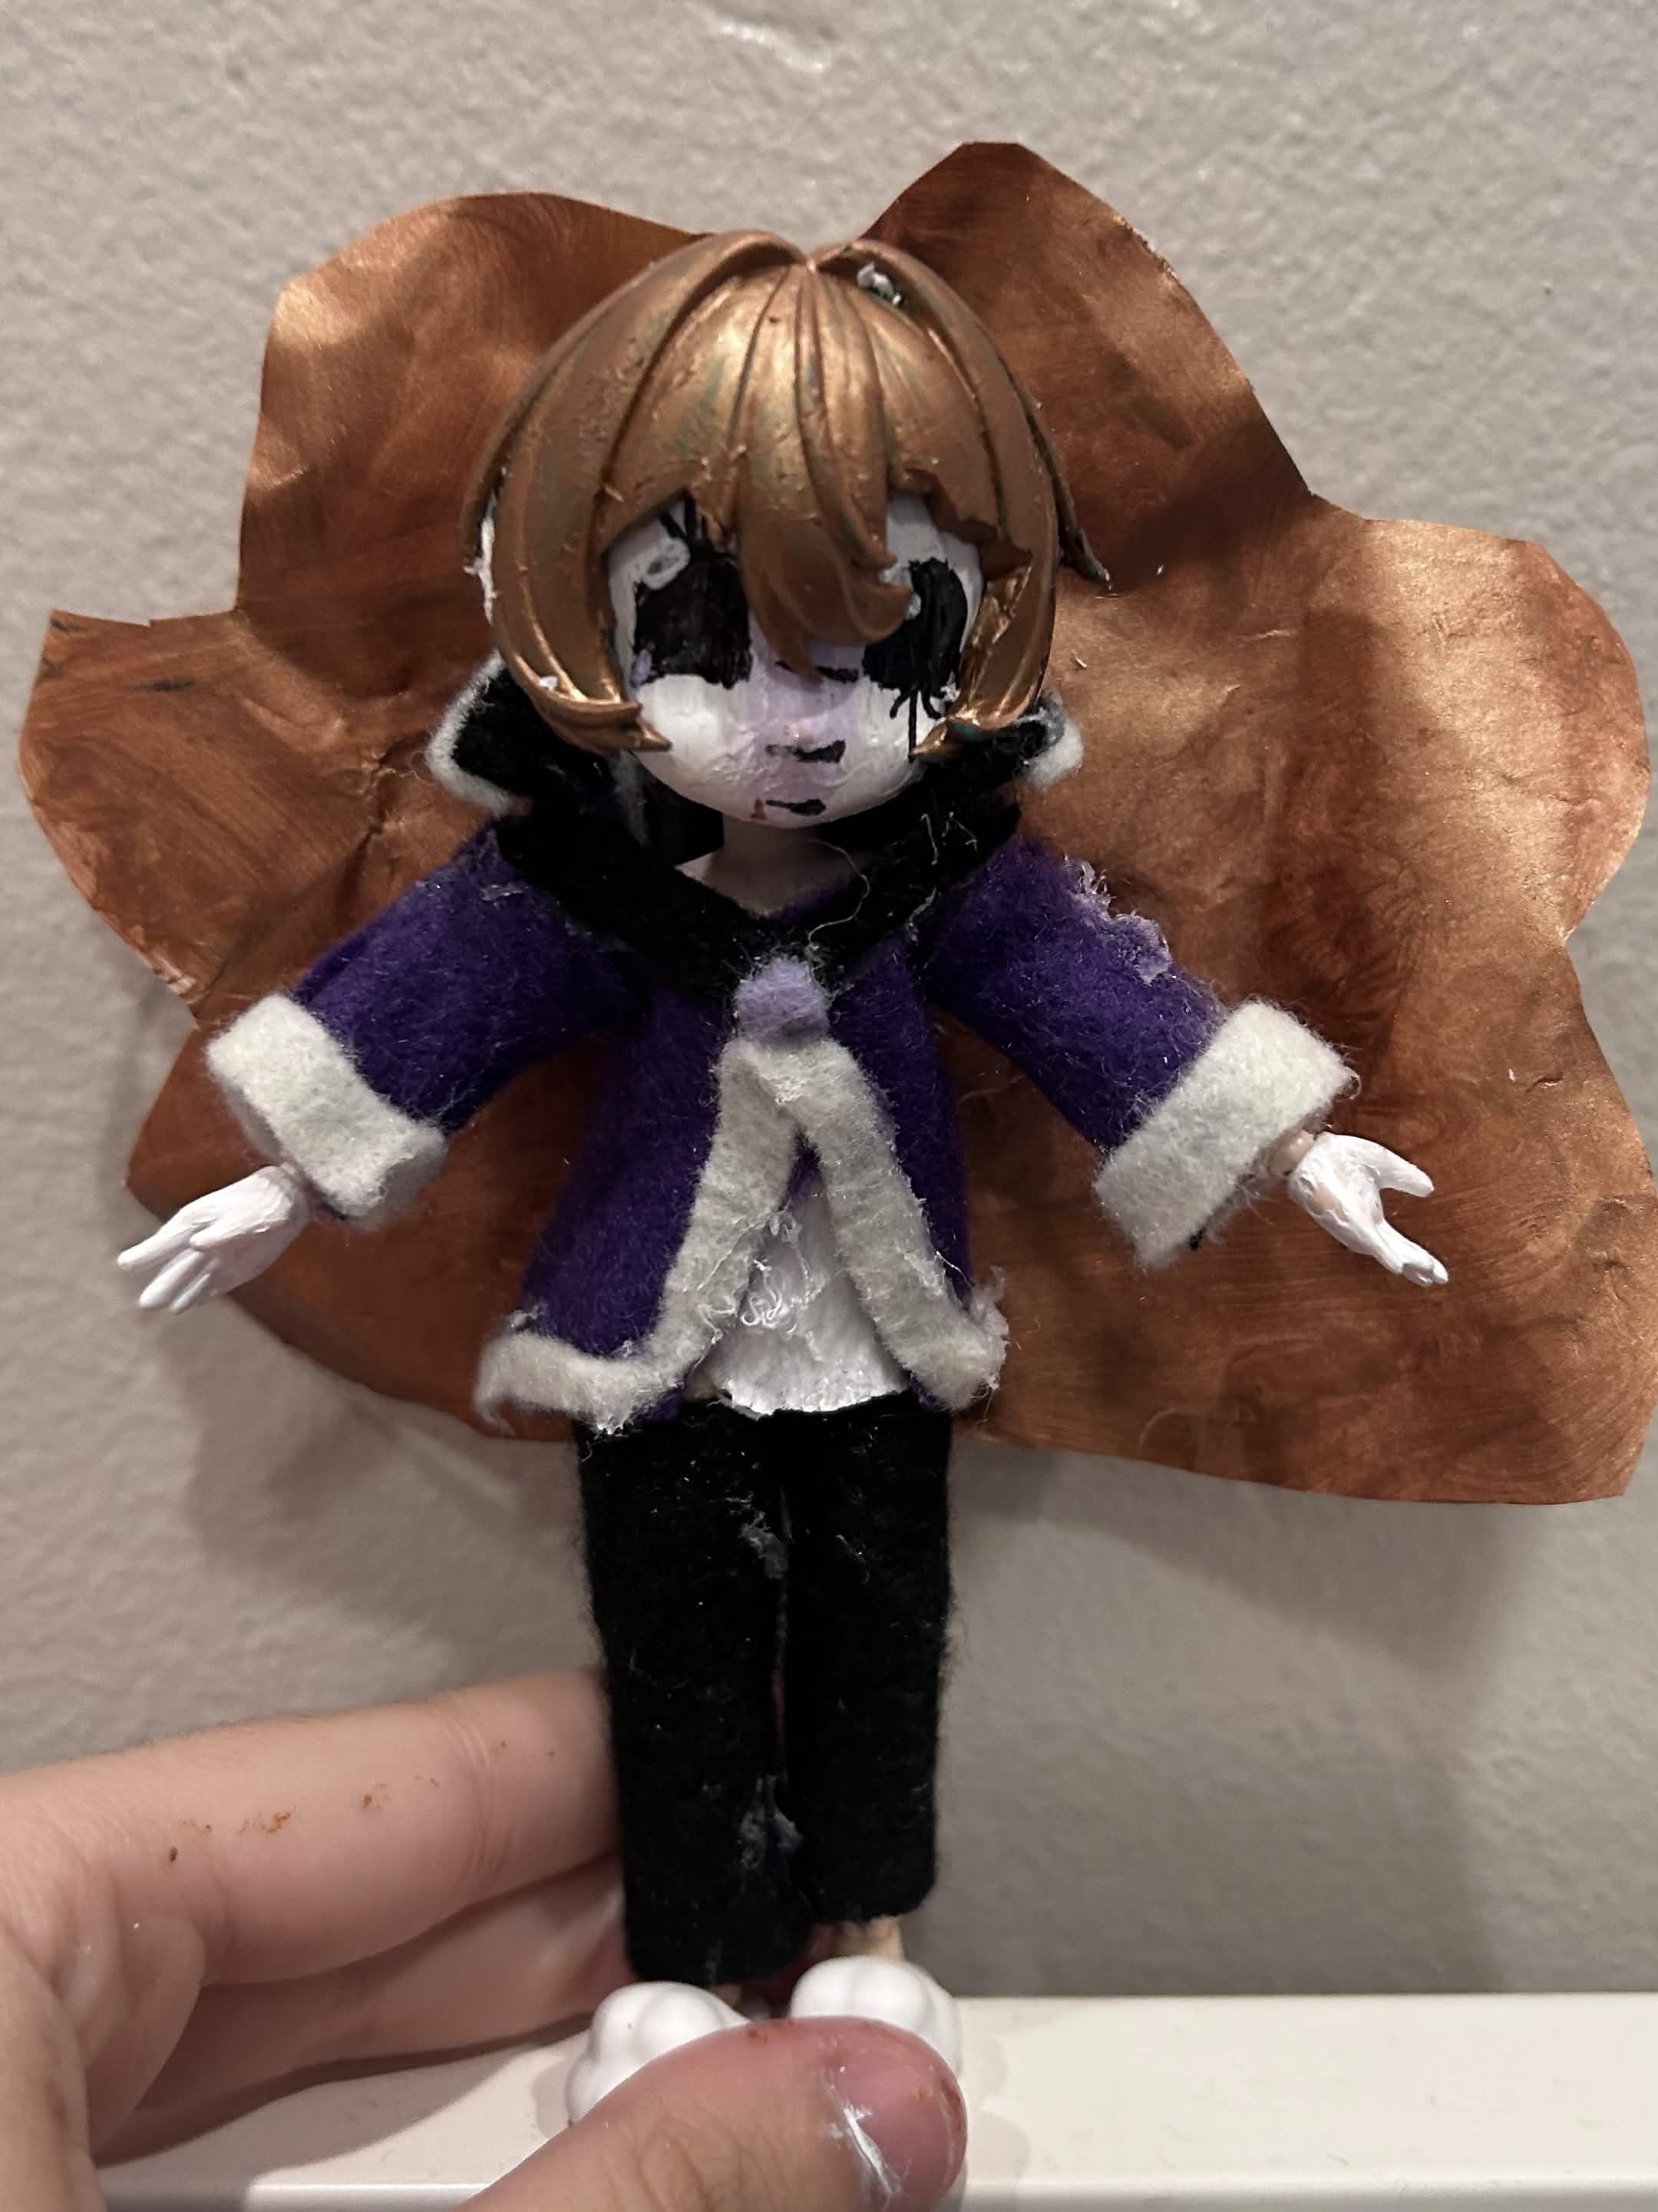
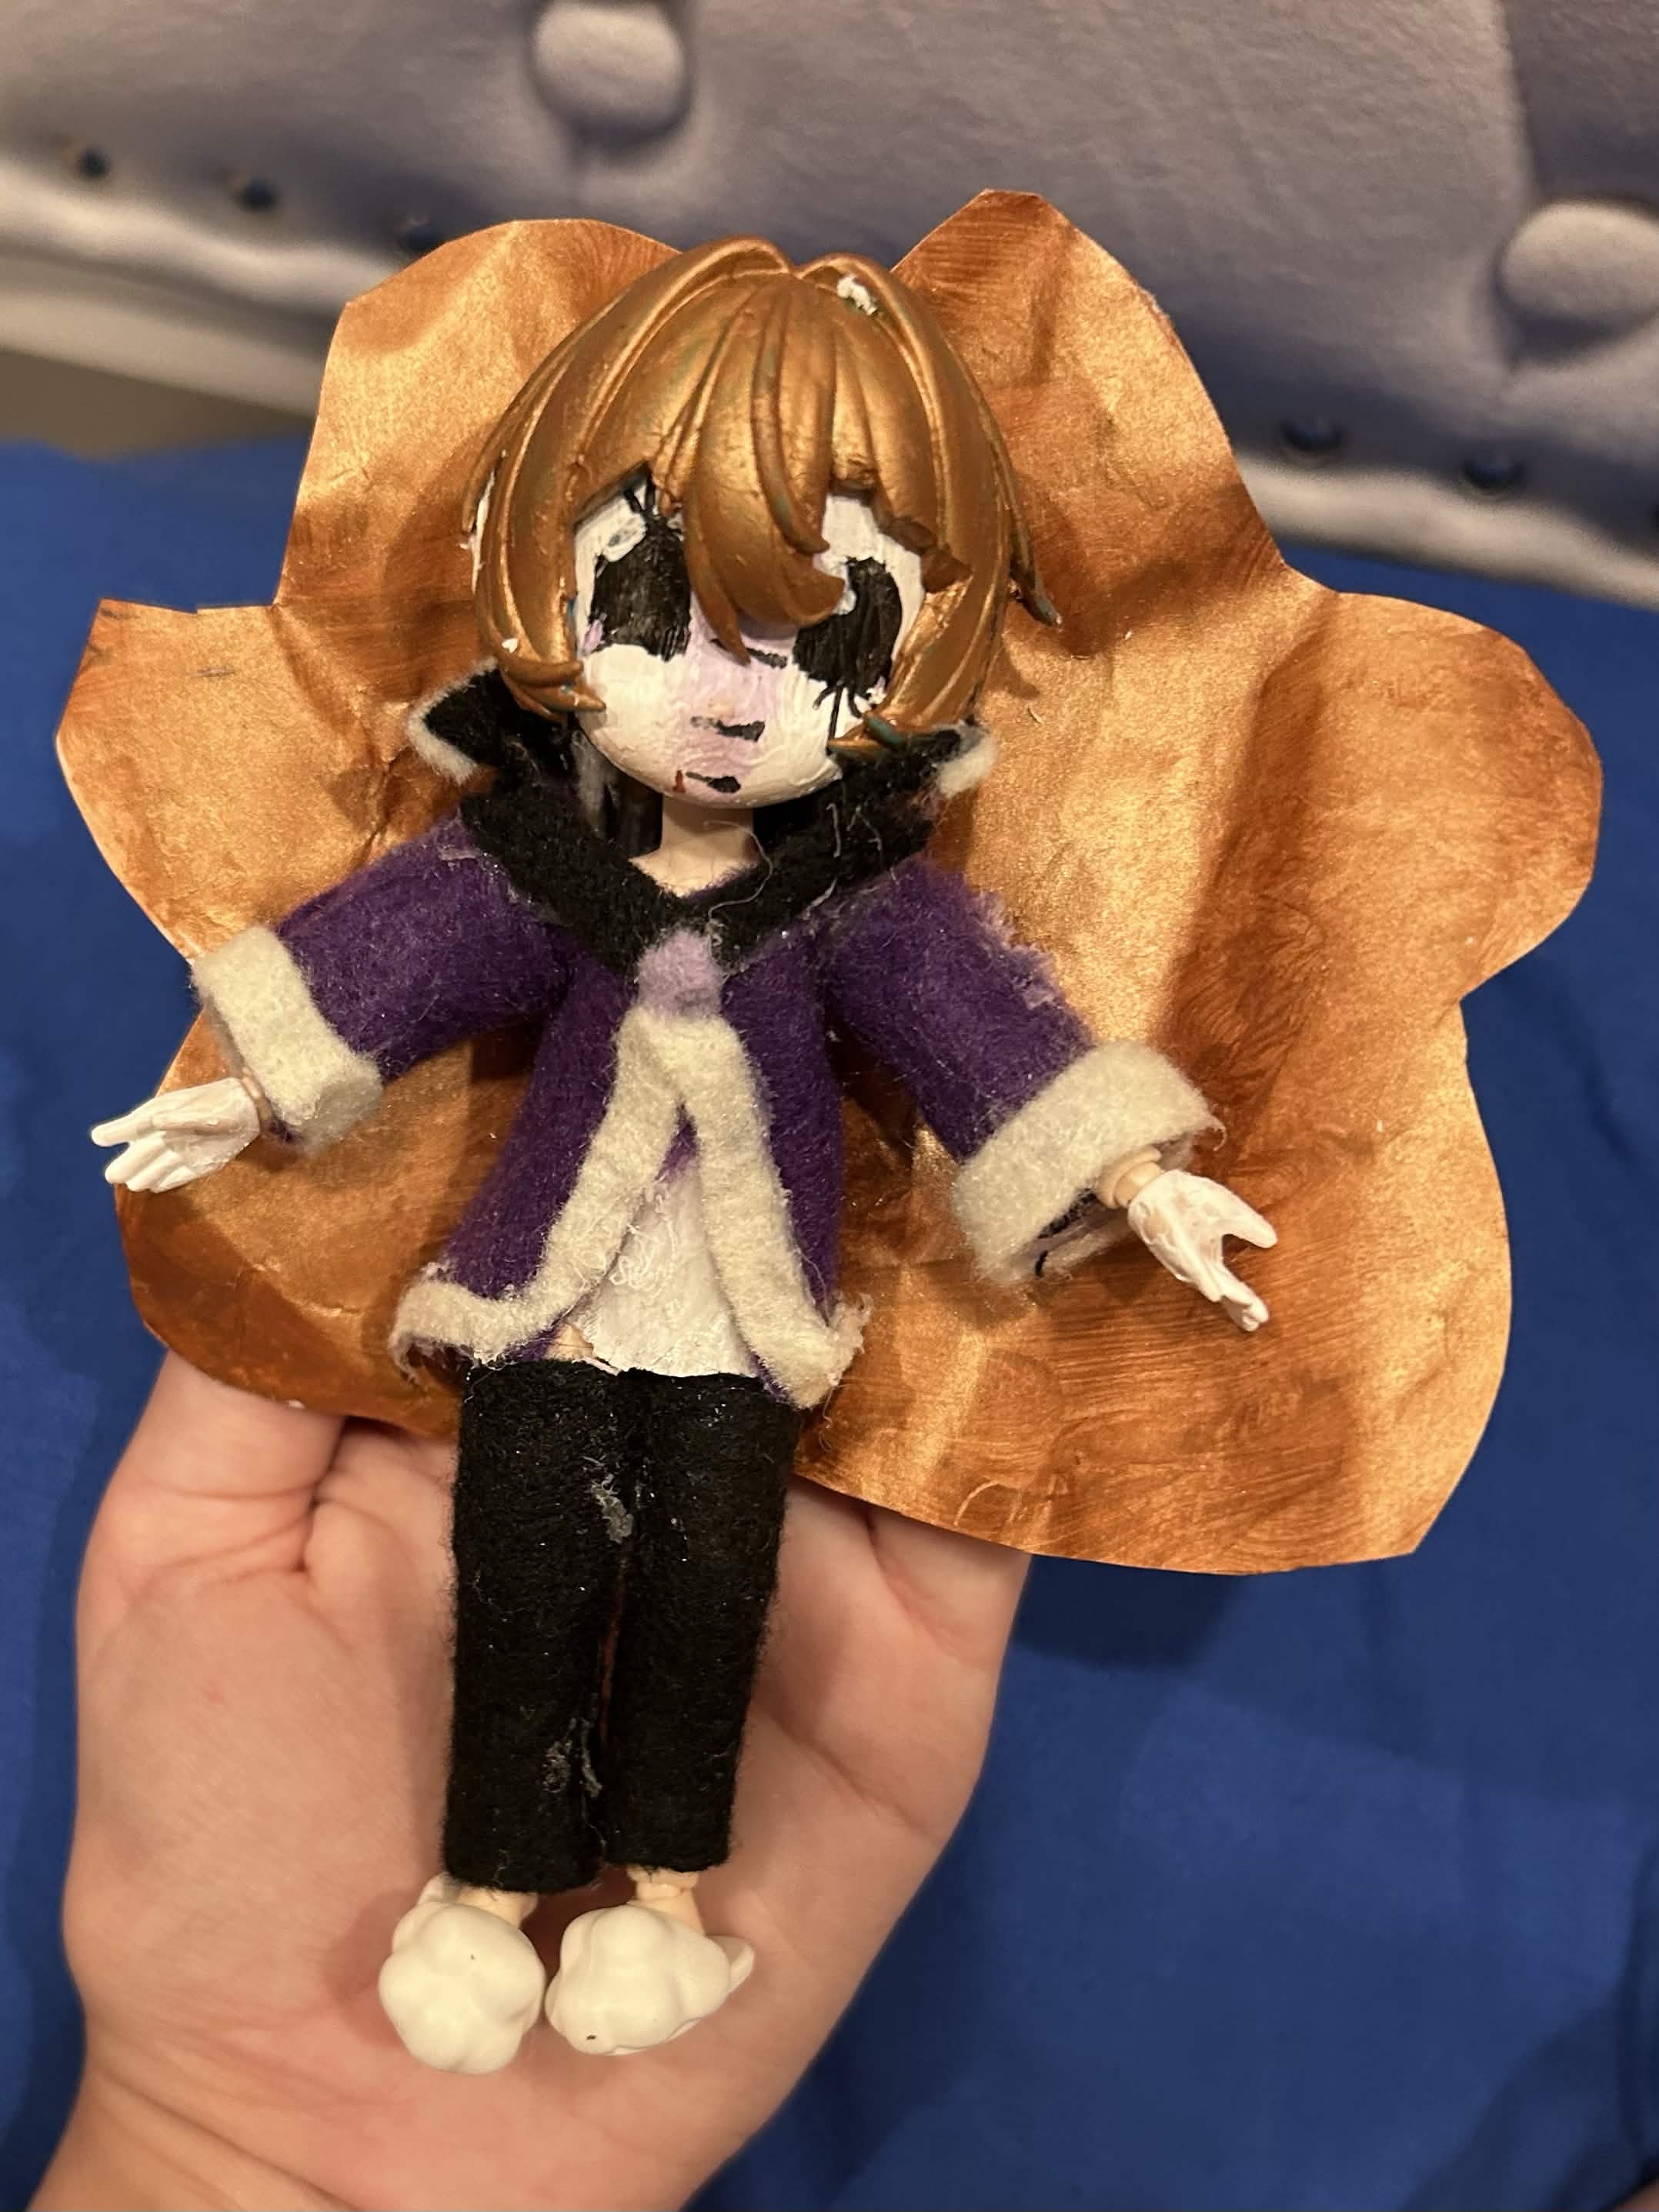
Annnnnd that’s pretty much it! When starting to work on the BJD, I honestly didn’t go in with much of a plan lol. I’m always one to wing it with projects, and this was a spur of the moment decision that I accidentally locked in for for like 5 hours so Unsurprising I fear. The thing I started with first was painting the blank face white to fit Spy’s mask, and then mixing a metallic purple with white to make the lighter purple on his eye makeup and strip down his mask. Then I used the sharpie paint pen to draw on his face. Very simple and straight forward!
Then I moved onto preparing the hair. I heated up the plastic with a hair dryer (a little tip I learned from my aforementioned friend who used to customize LPS back in her day) in order to cut through the bangs and shape it more accurately to Spy’s hair. I also had to do this because I realized I didn’t account for the hair covering parts of his face. WHOOPS. Don’t be like me and plan ahead guys 😭 I did admittedly not find my exacto knife, which meant I used regular scissors which led to some…interesting cuts. He did look a little ugly at first I fear, but after shaving it down a little with the blade I was able to get it looking decent. Then I moved onto painting the hair, which I got the color from by mixing bronze and burnt sienna paint.
Initially, I tried to model the back of Spy’s hair with clay. As many of you know, Spy’s hair is ridiculously big and the most inconvenient shape ever. This unfortunately meant that in order to get it the way I wanted, I’d have to essentially force glue the clay onto the back of Spy’s head. While this had worked just fine in previous projects such as my felt doll Spy I made years ago…uhm…there were lets say…a few problems with the clay hair on the BJD 😭 The clay hair sadly was wayyyy too heavy to actively stay on his head and the only real way to secure it would be gluing it to his entire body, which would remove the whole point of him being able to articulate and change his clothes and what not. As a result, I had to scrap it. RIP that chunk of shapey clay and also all the paint I used for the back hair…you will be missed.
My solution to the clay issue would be painting a piece of paper and using a nanodot to keep it attached to Spy’s head instead, a strange solution perhaps, but it worked! This also meant the BJD Spy could properly move his head 360 instead of only partway. This also meant I could finally move onto the clothes…YAY! I ended up cutting up the extra miku doll clothes in order to use it’s velcro so I could remove Spy’s shirt, which I hot glued together with felt. Just as a heads up, I DID NOT use gloves when gluing stuff. DO NOT DO THAT!! You should abosolutely use gloves if hot gluing stuff, the main reason I didn’t is because 1. im lazy 💀 sin of sloth and all 2. I’ve worked with hot glue A Lot, so I trust myself to not burn myself to an extreme degree. Despite that though, I did in fact burn myself multiple god damn times. and got a minor blister. But Shhhh…it was worth it…but yeah use gloves. Do not rawdog hot glue…
The shirt portion of the Spy BJD was primarily made with craft felt (which I had used for the Bewilthred dolls) and some lighter white fabric in the Miku parts clothes. I also made the pants (which in reality were just 2 black tubes) with felt. I would like to make actually good pants at some point, but uhhh….lets just say for now Spy has to be positioned in a way to avoid accidentally flashing the audience as the tubes did not manage to get all the way up 💀 but it works for now and that’s whats important!
After all that was done, I ended up painting Spy’s hands white as well so that it could look like his gloves! Very cute…I ended up skipping out on making his shoes just yet, because i was very tired LOL…but maybe I’ll make those out of clay instead! As a redemption…
But anyways….process aside…Below is the final Spy :3 he is so cute!!! I plan to make little outfits for him and I would love to make BJD’s of the other Bewilthredversers in the future! Especially since the blindbox he’s from was considerably cheap considering the value I got out of him! Now I have a leetol Spy…Gaze upon him in all his glory….
Anyways I’m really tired….Im gonna go sleep….for I am eepy….but if you got any enjoyment out of reading this, be sure to let me know!